
Aprilaire 700 Installation Manual PDF: A Comprehensive Guide
This guide details the Aprilaire 700 humidifier installation, covering automatic/manual controls, wiring, safety, and maintenance, referencing Table 1 for operation.
Understanding the Aprilaire 700 Humidifier
The Aprilaire 700 is an automatic humidifier designed for installation within the return duct of your heating system. It’s engineered to maintain optimal Relative Humidity (RH) throughout the winter, enhancing comfort and protecting your home. This humidifier employs a principle of precise control, sufficient capacity, and trouble-free performance, minimizing maintenance needs.
Crucially, the Aprilaire 700 operates in both automatic and manual control modes, adapting to your home’s specific conditions. Initial setup requires calibration during the first heating season to ensure accurate humidity regulation. Proper installation, ideally by a qualified heating and air conditioning contractor, is vital to avoid misapplication and potential warranty issues. The unit’s performance relies on consistent monitoring and adherence to the provided Operation Guide (Table 1) for optimal results.
Understanding its core function – maintaining comfortable RH levels – is key to appreciating the Aprilaire 700’s benefits.
Key Features and Benefits
The Aprilaire 700 humidifier boasts several key features, including precise humidity control and adaptable operation via automatic and manual settings. Its design prioritizes trouble-free performance and minimal maintenance, ensuring long-term reliability. A significant benefit is the ability to achieve optimum Relative Humidity (RH) for maximum comfort during dry winter months.
This humidifier’s capacity is designed to effectively address the humidity needs of various home sizes. Proper installation, as detailed in the accompanying instructions and wiring diagrams, is crucial for realizing these benefits. The unit’s operation is clearly outlined in Table 1 of the owner’s manual, facilitating easy understanding and adjustment.
Ultimately, the Aprilaire 700 delivers enhanced indoor air quality and comfort, protecting your home and family from the adverse effects of low humidity.
Automatic vs. Manual Control Modes
The Aprilaire 700 offers both automatic and manual control modes, providing flexibility to suit individual preferences and home conditions. Automatic mode utilizes the control unit, installed within the return duct, to regulate humidity based on pre-set parameters and indoor temperature. This requires initial calibration during the first heating season to align with your home’s specific needs.
Manual mode allows for direct adjustment of the humidifier’s output, offering greater control for users who prefer a hands-on approach. Referencing Operation Guide (Table 1) is essential for understanding the settings and their corresponding humidity levels in both modes.
Choosing between these modes depends on desired convenience and the consistency of your home’s heating patterns. Automatic mode simplifies operation, while manual mode provides personalized control.
Initial Setup and Calibration
Proper initial setup and calibration are crucial for optimal Aprilaire 700 performance, particularly during the first heating season. The humidifier control, located in the cold air return duct, requires careful adjustment to match your home’s unique characteristics. Begin by consulting the Operation Guide (Table 1) to understand the relationship between control settings and expected humidity levels.
Start with a conservative setting and monitor indoor humidity using a separate hygrometer. Gradually adjust the control until the desired relative humidity (RH) is achieved. This process ensures the humidifier operates efficiently and avoids over-humidification.
Remember that factors like home insulation, air leakage, and outdoor temperature influence humidity levels, necessitating periodic recalibration throughout the winter.
Locating the Control Unit
The Aprilaire 700 Humidifier Control is specifically designed for installation within the cold air return duct of your heating system. This strategic placement allows the control to accurately monitor airflow and respond to the home’s humidity needs. Proper location is vital for reliable operation and accurate readings.
Ensure the control unit is mounted securely and is easily accessible for future maintenance or adjustments. Avoid areas prone to excessive moisture or direct contact with insulation. Refer to the included installation instructions and wiring diagram for detailed guidance on mounting procedures.
Correct positioning within the ductwork maximizes the control’s effectiveness and contributes to consistent, comfortable humidity levels throughout your home.
Wiring Diagram Overview
The Aprilaire 700 installation necessitates careful attention to the wiring diagram provided with the unit and within the comprehensive installation instructions. This diagram illustrates the correct connections between the humidifier control, the heating system, and the power source.
Typically, wiring involves connecting the control unit to the furnace’s control board, utilizing low-voltage wiring for signaling. It’s crucial to identify the appropriate terminals on both the humidifier control and the furnace for proper functionality. Detailed wiring instructions are included to guide even inexperienced installers.
Always disconnect power to the heating system before commencing any wiring work. Incorrect wiring can lead to system malfunction or safety hazards. Refer to a qualified heating and air conditioning contractor if you are unsure about any aspect of the wiring process.
Humidifier Safety Precautions
Prioritizing safety during Aprilaire 700 installation is paramount. Always disconnect power to the heating system at the breaker before beginning any electrical work to prevent shock hazards. Improper installation can lead to water damage or system malfunction, so adhere strictly to the provided instructions.
Ensure the humidifier is installed by a qualified heating and air conditioning contractor to avoid misapplication of the product, which could void the warranty. Be mindful of water connections; secure them properly to prevent leaks.
The owner should receive the manual containing operation and warranty details. Never operate the humidifier without a properly installed water panel and filter. Regular inspection and maintenance are vital for safe and efficient operation.

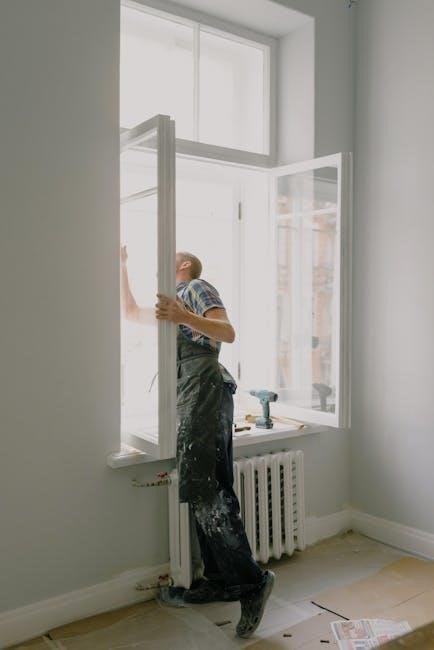
Installation in the Return Duct
The Aprilaire 700 humidifier control is specifically designed for installation within the cold air return duct of your heating system. This placement allows for effective humidification of the air before it reaches your furnace or air handler. Utilize the enclosed installation instructions, paying close attention to the wiring diagram for correct connections.
Proper duct selection is crucial; ensure sufficient space and structural integrity to support the humidifier’s weight. Securely mount the control unit using appropriate hardware, avoiding any obstructions to airflow.
Refer to the detailed installation instructions included with the humidifier for precise guidance on duct preparation and mounting procedures. A professional installation ensures optimal performance and prevents potential issues.
Connecting to the Heating System
Integrating the Aprilaire 700 with your heating system requires careful attention to wiring and safety protocols. The humidifier control connects to the furnace’s control board, typically utilizing a 24-volt power source. Detailed wiring instructions are provided within the humidifier’s safety and installation manual – consult this document thoroughly before proceeding.
Ensure the heating system is powered off during all wiring connections to prevent electrical hazards. Correctly identify the appropriate terminals on both the humidifier control and the furnace control board. Improper wiring can damage the system or void the warranty.
A qualified heating and air conditioning contractor is recommended for this step, guaranteeing a safe and compliant installation.

Detailed Wiring Instructions
Aprilaire 700 wiring involves connecting the humidifier control to the furnace’s 24-volt system. Refer to the wiring diagram included with the unit and the furnace’s manual for specific terminal identification. Typically, a red wire connects to the Rh terminal, while a white wire connects to the W terminal on the furnace control board.
A yellow wire often provides power to the humidifier’s solenoid valve, and a common (C) wire completes the circuit. Ensure all connections are secure and properly insulated. Double-check polarity before restoring power.
Important: Disconnect power to the furnace before any wiring. Incorrect wiring can cause system malfunction or create a safety hazard. A qualified HVAC technician is highly recommended for this installation step.

Operation Guide (Table 1) Reference
Table 1, found within the Aprilaire 700 owner’s manual, is crucial for understanding optimal humidity settings. It correlates outdoor temperature with recommended humidity levels, ensuring comfort and preventing condensation. The table guides users in adjusting the humidifier control to maintain desired Relative Humidity (RH) throughout the heating season.
Initial setup requires referencing Table 1 to calibrate the control based on your home’s specific conditions. The guide details how to select appropriate settings for both automatic and manual modes. Understanding the table’s data allows for precise control, maximizing comfort while minimizing potential issues like window condensation or mold growth.
Regularly consulting Table 1 ensures efficient and effective humidifier operation.
Understanding Relative Humidity (RH)
Relative Humidity (RH) represents the amount of moisture in the air compared to the maximum it can hold at a given temperature. Aprilaire humidifiers aim for optimum RH for maximum comfort during winter. Lower temperatures require lower RH settings to prevent condensation, while warmer temperatures can tolerate higher levels.
Maintaining proper RH is vital for health and home preservation. Too low RH can cause dry skin, irritated sinuses, and static electricity. Conversely, excessive RH fosters mold growth and condensation on windows. The Aprilaire 700, guided by Table 1, allows precise RH control.
Precise control, sufficient capacity, and minimal maintenance are key considerations when evaluating a humidifier’s performance, all centered around achieving and sustaining optimal RH.
Troubleshooting Common Issues
Common issues with the Aprilaire 700 often relate to improper settings or maintenance. If the humidifier isn’t producing enough moisture, verify the control is set to ‘Automatic’ and calibrate it according to the Operation Guide (Table 1). Check the water supply line for kinks or obstructions, ensuring adequate water flow to the unit.
Excessive condensation might indicate the RH setting is too high for the current temperature; lower the setting incrementally. If the control doesn’t respond, inspect the wiring connections, referencing the Wiring Diagram. Always prioritize safety – disconnect power before inspecting electrical components.
Remember, a qualified heating and air conditioning contractor should handle complex repairs to avoid misapplication and potential warranty voiding.
Maintenance Requirements
Regular maintenance is crucial for optimal Aprilaire 700 performance and longevity. The humidifier requires periodic inspection and cleaning to ensure efficient operation and prevent issues. Filter replacement is a key component, with frequency depending on water quality and usage – consult the owner’s manual for specific recommendations.
Inspect the water panel annually for mineral buildup, cleaning or replacing as needed. Verify the solenoid valve operates correctly, ensuring proper water flow. A qualified contractor can assist with more complex maintenance tasks.
Consistent upkeep, as outlined in the Aprilaire 700 documentation, minimizes the risk of malfunctions and preserves the warranty. Ignoring maintenance can lead to reduced efficiency and potential system failure.
Filter Replacement Procedures

Filter replacement for the Aprilaire 700 is a straightforward process vital for maintaining air quality and humidifier efficiency. Begin by turning off the power to the humidifier at the furnace. Locate the evaporator pad – typically accessed by removing a panel on the humidifier unit.
Carefully remove the old pad, noting its orientation for correct installation of the new one. Ensure the replacement pad is the correct Aprilaire model for your unit. Insert the new pad, aligning it properly within the humidifier housing.
Replace the access panel and restore power. Refer to the Operation Guide (Table 1) for recommended replacement intervals, which vary based on water quality and usage. Regular filter changes prevent mineral buildup and maintain optimal performance.
Cleaning and Inspection
Regular cleaning and inspection of your Aprilaire 700 humidifier are crucial for longevity and efficient operation. Begin by disconnecting power to the unit at the furnace. Inspect the water panel and solenoid valve for mineral buildup – a common issue, especially with hard water.
Gently clean these components with a solution of white vinegar and water, rinsing thoroughly afterward. Examine the drain line and tubing for clogs or leaks, clearing any obstructions. Check the fan for debris and ensure it spins freely.
Inspect wiring connections for corrosion or damage, tightening as needed. Refer to the owner’s manual for detailed diagrams. Consistent maintenance, as outlined in the Aprilaire 700 manual, prevents issues and ensures optimal humidity control.
Warranty Information
Aprilaire provides a warranty on the 700 humidifier, but it’s contingent upon proper installation by a qualified heating and air conditioning contractor. This stipulation is vital; self-installation or installation by unqualified personnel voids the warranty.
The warranty covers defects in materials and workmanship for a specified period, detailed within the owner’s manual. Keep your proof of purchase and installation documentation readily available for any warranty claims. Misapplication of the product, resulting from improper installation, is explicitly excluded.
Review the Aprilaire 700 installation manual PDF for the complete warranty terms and conditions. Contact Aprilaire support for clarification or to initiate a claim, ensuring you have your model and serial number handy.
Qualified Contractor Installation
Aprilaire strongly recommends, and often requires for warranty validity, that the 700 humidifier be installed by a qualified heating and air conditioning contractor. This isn’t merely a suggestion; improper installation can lead to inefficient operation, system damage, and, critically, voiding of the warranty.
A qualified contractor possesses the expertise to correctly assess your home’s heating system, ductwork, and humidity needs. They’ll ensure proper wiring according to the wiring diagram, correct installation in the return duct, and appropriate calibration for optimal performance.
Refer to the Aprilaire 700 installation manual PDF for detailed guidance and to locate authorized contractors in your area. Prioritize professional installation to safeguard your investment and ensure years of reliable, comfortable humidity control.
Voiding the Warranty
Aprilaire’s warranty on the 700 humidifier is contingent upon proper installation and adherence to the guidelines outlined in the installation manual PDF. Several actions can unfortunately void the warranty, leaving you responsible for repair or replacement costs.
Specifically, installation by anyone other than a qualified heating and air conditioning contractor is a primary cause for warranty invalidation. Misapplication of the product, stemming from incorrect wiring or improper location of the control unit, also disqualifies coverage.
Furthermore, failure to follow recommended maintenance requirements, such as regular filter replacement procedures and cleaning and inspection, can void the warranty. Always retain proof of professional installation and maintenance to protect your investment. Refer to the manual for complete warranty details.

Aprilaire Humidifier Principles
Aprilaire humidifiers, including the 700 model detailed in the installation manual PDF, operate on a fundamental principle: adding moisture to your home’s air to achieve optimal relative humidity (RH). They employ evaporation, utilizing a wicking system to draw water up to a media where it’s dispersed into the airflow.

The core aim is to maintain a comfortable indoor environment during heating seasons. Aprilaire focuses on refinements to this basic principle, striving for precise control, sufficient capacity, and reliable performance. The 700, like other models, is designed for trouble-free operation with minimal maintenance.
Understanding these principles, as explained in the manual, is crucial for proper setup and operation. The goal is to maximize comfort while avoiding condensation issues, ensuring a healthy and efficient home environment throughout the winter months.
Optimum RH for Comfort
Achieving the optimum relative humidity (RH) is central to the benefits offered by the Aprilaire 700 humidifier, as detailed in its installation manual PDF. Maintaining the correct RH level – generally between 30-40% – significantly enhances comfort during colder months. This range minimizes static electricity, reduces dry skin, and alleviates respiratory discomfort.
The Aprilaire system, through precise control, aims to deliver maximum allowable comfort all winter long. Too little humidity leads to dryness, while excessive humidity can cause condensation and mold growth. The 700’s control system, explained in Table 1 of the manual, allows homeowners to fine-tune humidity levels.
Proper RH contributes to a healthier and more enjoyable living environment, and the Aprilaire 700 is engineered to consistently achieve this balance.
Importance of Precise Control
Precise control is a cornerstone of the Aprilaire 700 humidifier’s effectiveness, thoroughly explained within the installation manual PDF. Unlike simpler systems, the Aprilaire offers nuanced humidity regulation, preventing both under-humidification and over-humidification. This is crucial for maintaining a comfortable and healthy indoor environment.
The manual emphasizes that consistent, accurate RH levels minimize issues like static shock, dry skin, and respiratory irritation. The 700’s control system, detailed in Table 1, allows for adjustments based on home conditions and personal preference. Without this precision, a humidifier can be ineffective or even detrimental.
Aprilaire prioritizes this feature, ensuring sufficient capacity, trouble-free operation, and minimal maintenance through its advanced control mechanisms.
Sacramento, California Context (Historical Note)
While seemingly unrelated to a humidifier installation manual PDF, Sacramento’s history offers a unique perspective on indoor climate control needs. Founded during the 1848 Gold Rush at Sutter’s Mill, the city rapidly grew, necessitating considerations for comfortable living conditions amidst a changing environment.
Early Sacramento homes, quickly constructed to house a booming population, likely faced challenges with humidity and air quality. The city’s location in the Sacramento Valley, along the Sacramento and American Rivers, contributes to specific climate patterns. Modern Sacramento, 90 miles northeast of San Francisco, still experiences seasonal variations.
Understanding this historical context highlights the enduring human desire for a controlled indoor environment, a need the Aprilaire 700 addresses with its precise humidity regulation features.
Gold Rush Influence on Sacramento
The 1848 Gold Rush fundamentally shaped Sacramento, impacting its early infrastructure and, indirectly, the future need for indoor climate control solutions like the Aprilaire 700. The rapid influx of people demanded quick housing, often hastily built, lacking proper insulation or ventilation – conditions ripe for humidity imbalances.
This boomtown environment prioritized immediate shelter over long-term comfort. However, as Sacramento evolved from a temporary settlement to a permanent city, residents began seeking ways to improve their living conditions. The initial focus was on basic survival, but eventually, comfort became a priority.
The legacy of this rapid growth underscores the importance of adaptable solutions, mirroring the Aprilaire 700’s ability to adjust to varying home conditions and maintain optimal humidity levels.
Sacramento’s Modern Landscape
Today’s Sacramento, a city 88 miles northeast of San Francisco, presents a diverse architectural landscape – from historic buildings to modern homes. This variety necessitates adaptable climate control solutions, like the Aprilaire 700 humidifier, to address differing insulation levels and air circulation patterns.
The city’s location in the Sacramento Valley, along the Sacramento and American Rivers, introduces unique humidity challenges. Seasonal fluctuations require precise humidity management for optimal comfort and indoor air quality. Modern construction techniques, while improved, still benefit from supplemental humidity control.
Understanding Sacramento’s climate is crucial for proper Aprilaire 700 installation and calibration, ensuring efficient operation and maximizing the benefits of consistent, comfortable indoor air. The need for reliable humidity control remains relevant in this evolving urban environment.
Downloading the Aprilaire 700 PDF Manual
Accessing the Aprilaire 700 humidifier’s owner’s manual in PDF format is crucial for successful installation and operation. The official Aprilaire website provides a readily available digital copy, ensuring you have the latest version with detailed instructions and wiring diagrams.
This PDF manual contains vital information regarding automatic and manual control modes, initial setup, calibration procedures, and comprehensive troubleshooting guides. It also outlines essential safety precautions and maintenance requirements, including filter replacement procedures and cleaning guidelines.
Downloading the manual allows for convenient offline access during installation, eliminating the need for constant internet connectivity. It’s a valuable resource for both homeowners and qualified contractors, guaranteeing a proper installation and preserving the product’s warranty.
Accessing Online Resources
Beyond the official PDF manual, numerous online resources support Aprilaire 700 humidifier owners and installers. Aprilaire’s website features a dedicated support section with FAQs, troubleshooting tips, and video tutorials demonstrating installation and maintenance procedures.

Online forums and communities dedicated to HVAC systems often host discussions about the Aprilaire 700, providing a platform for users to share experiences, ask questions, and receive advice from fellow enthusiasts and professionals. These forums can be invaluable for resolving specific issues or gaining insights into best practices.
Furthermore, many HVAC contractors maintain websites or social media pages offering helpful resources and guidance. Utilizing these online tools can streamline the installation process and ensure optimal performance of your humidifier.
Contacting Aprilaire Support
For direct assistance with your Aprilaire 700 humidifier, reaching out to Aprilaire’s customer support is a valuable option. Their dedicated team can provide expert guidance on installation, operation, troubleshooting, and warranty inquiries. Support is readily available through multiple channels to accommodate your preferences.
You can contact Aprilaire via phone during business hours, allowing for real-time conversation and immediate assistance. Alternatively, their website offers a comprehensive contact form for submitting questions or requests. Expect a prompt response from their support team via email.
Ensure you have your humidifier’s model number and date of purchase readily available when contacting support to expedite the assistance process. A qualified contractor installation is often required to maintain warranty validity.